Showing posts with label applesauce. Show all posts

Monday, August 8, 2022

Product review: "Superb" canning lids

In June, I asked my contact at Lehman's (Glenda Lehman Ervin, Director of Marketing) for a supply-chain update, which she provided.

I was especially interested in one thing she mentioned: their bulk canning lids are back.

Among canners, Lehman's is famous for their bulk canning lids – hundreds of lids for a fraction of the price of conventional boxes of a dozen lids you find at the grocery store. Many years ago I bypassed the need for disposable lids by purchasing a lifetime supply of Tattlers, but there are still times I like using disposable lids. Yet I had never ordered a bulk supply from Lehman's (something I regretted), and for a while it seemed I had missed that window of opportunity.

This is why I was delighted to note their bulk lids are back in stock, though this time from a different producer.

"We have a new canning lid supplier (Superb – made locally just a few miles from the store), which is helping with the canning lid back orders," Glenda wrote. "Customers tell us they really like the lids, which are thicker and work well for high pressure canning."

I asked if I could test-drive a few of the lids for purposes of writing a review, and within a few days a dozen arrived in the mail.

The very first thing that's noticeable about these lids is the bright-blue gasket. The second thing is they are indeed thicker and feel heftier. The quality seems excellent. I mean seriously excellent – better than Ball lids.

Here's a lid edge-on.

And here's a "Superb" lid compared to a Ball lid. The gasket is noticeable thicker.

I tackled a double canning project early this morning, before the day got too hot. I wanted to test the lids with a water-bath project as well as a pressure-canning project. I decided on applesauce for the former, and green beans for the latter (splitting the 12 lids between the two projects). Because it's too early in the season for either of these available from the garden, I purchased apples from the store...

...and frozen cut green beans.

I started by dumping the beans in hot water to defrost them.

My canning book recommends hot-packing beans...

...so I brought them to a boil.

While the pot was heating, I started processing the apples.

I tossed the chunks in a pot of cold water with a bit of lemon juice, to keep them from browning while I finished peeling and cutting everything.

Once everything was peeled and cut, I drained most (but not all) of the water, and put the pot on the stove. For applesauce, the apple chunks need to be "steamed" into softness. (I covered the pot with a lid.)

While the apples were steaming, I went back to the green beans, which by this point were hot. I filled six jars with beans and added a half-teaspoon of salt to each.

Then I topped the jars with hot cookwater.

Then, because I had more beans than test lids, I filled five more jars and just used regular Ball lids.

Soon everything was ready for the canner. 

(I paused to add a thin layer of petroleum jelly to the rim of the canner lid. This is recommended every few uses.)

I capped the canner and brought the pressure up to 15 lbs. and let it process for 20 minutes.

While the canner was coming up to pressure, I turned my attention back to the apples, which by this point were fully steamed and soft.

Using a slotted spoon, I scooped the soft apple chunks into a blender, a bit at a time.

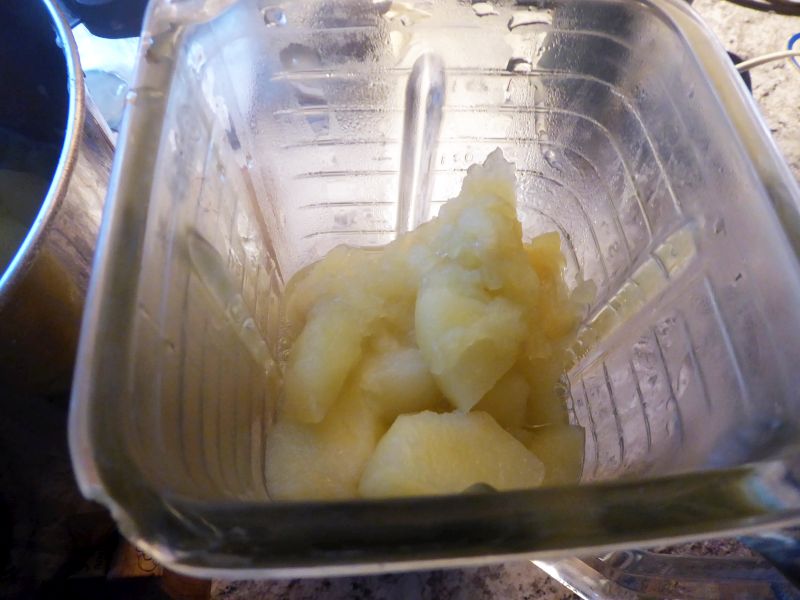
A few seconds whizzing the apple chunks around, and the result was a silky-smooth applesauce I could pour directly into the jars for processing.

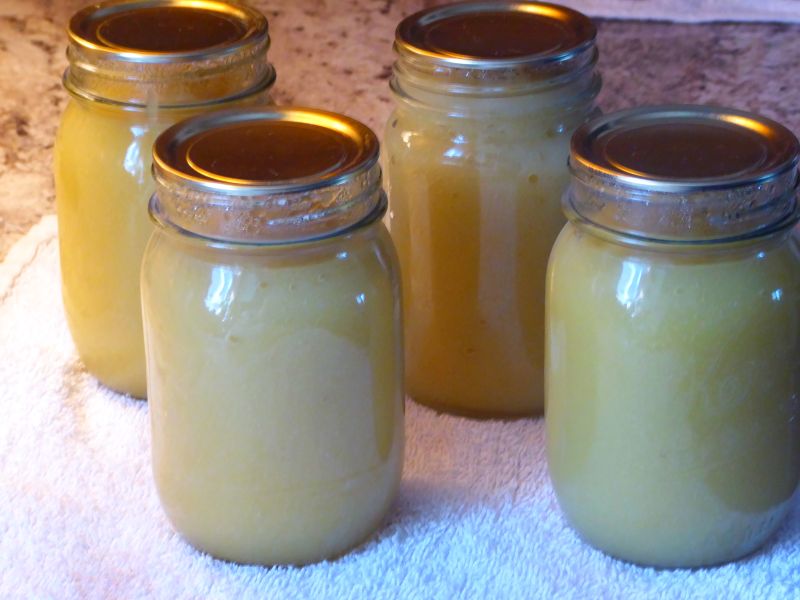
At this point some people like to add stuff to the applesauce – sweeteners or cinnamon or even red-hots (candy). I prefer my applesauce to be plain and unsweetened, so it was a simple matter to just pour the sauce into the jars and cap them. I only had enough applesauce to fill four jars, which meant I had two lids left over.

Into the pot of water (notice the rack at the bottom – never can anything without a rack!).

I covered the pot and turned up the heat. I couldn't start timing until the water was at a rolling boil.

At this point the stove was full – pressure canner on the left, water bath on the right.

When the water bath was at a rolling boil, I started the timer.

After all that prep work, both the beans and the applesauce finished up almost exactly at the same time. I turned off the heat on both. I let the jars of applesauce sit for a few minutes in the hot water before pulling them out (this helps keep the contents from bubbling up and overflowing the jars). The pressure canner, of course, had to come down to "zero" pressure before I could open it.

I pulled the jars of applesauce out and was mildly distressed to see the lids had not yet sealed. Oh great. I put the jars on a towel and waited. And waited. And waited.

Then...THUNK. One after the other, they all "popped" and sealed. Interestingly, the "pop" was in a base tone, not a treble tone – a much deeper sound than a standard lid. As Don joked, "They have manly pops, not girly pops." I expect the short delay in sealing was due to the thicker nature of the lids.

When the pressure came down on the beans, I pulled them from the canner and the same thing happened – a short delay, then one by one they all popped in and sealed.

I'm extremely pleased with the quality of these lids, and can recommend them without hesitation. What I can recommend even more is the price.

I picked up a couple boxes of regular-mouth Kerr lids at our local grocery store last February. They cost $4.69/box of 12 lids, or $0.39/lid.

However Superb (regular-mouth) lids from Lehman's are much more economical: $19.99 for a pack of 60 ($0.33 each), or $84.99 for a back of 360 lids ($0.23 each). (The wide-mouth lids are $84.99 for a pack of 300, or $0.28/each.)

If anyone is in the market for bulk quantities of high-quality canning lids, this is the deal for you.

In fact, both the price and the quality are hard to resist. I think I'll place an order myself. After all, I don't want to miss that window of opportunity again.

Tuesday, December 17, 2013

Recipes for the boxed stuff

In response to the post on Packing Christmas boxes, a reader said, "Please include recipes for those who only know how to make the box stuff. That is why I come here, to learn from the pros! Thanks!!!"

I thought this was an excellent idea. Most of the time, homemade versions of boxed stuff are easy and delicious, and this reader is correct -- a lot of people don't know how to make them.


So I thought we could all contribute our favorite homemade versions of "the boxed stuff" and help those who are just learning to cook.

Some time ago we had a lively discussion about the basics of kitchen equipment. For new cooks, this is a worthwhile post to review because so many people left such excellent comments.


Everyone has a favorite cookbook. While I have many cookbooks, my favorite is the classic Better Homes & Garden. It's battered and stained and torn from many years of faithful use.


Scratch cooking requires understanding basic weights and measures. Many cookbooks include a handy table, but cooks should be familiar with such things as how many teaspoons in a tablespoon (three), how many ounces in a cup (eight), how many cups in a pint (two), how many pints in a quart (two), etc. (Those outside the U.S. will appreciate the logic of the metric system rather than the English system we so stubbornly cling to.)


Cooking from scratch requires a few necessary tools of the trade, which can usually be picked up cheaply at thrift stores... such things as cookie sheets, muffin tins, measuring spoons, measuring cups, mixing bowls, kitchen timers, etc.


Scratch cooking also requires a decent supply of such necessary additives as baking powder, baking soda, spices, vinegar, vinegar, cooking oil, etc.

So let's review some of the boxed or canned foods listed on the sheet for the Christmas boxes. I'll start with macaroni and cheese -- here's the link to a blog post on how to make it.


Bread stuffing. There are some directions and illustrations in this blog post.


Chili. Everyone has a favorite recipe, it seems. This is the one Don cobbled together (to make a large quantity). Here's a post with a tutorial on how this chili was made.


I must admit the result was delicious.


Fruit cocktail. I have a blog post on making fruit salad, which is a zillion times better than canned fruit cocktail. However admittedly the fresh fruits will cost more than a can or two of fruit cocktail.


Homemade chicken strips. Here's a tutorial blog post.


Applesauce. I don't have a blog post, but it's pretty quick. Start with peeled and cored FIRM apples (avoid Red or Yellow Delicious, as they're too mushy):


Put the apple pieces in a pot, then add half as much water as apples (you can eyeball this, it's not an exact science).


Cover the pot and bring to a boil, then turn the heat down and let simmer for about half an hour until the apples are very soft.


Then pour the apples and water into either a blender, or use a bowl and mixer (a blender will make the applesauce smoother, a mixer will make it chunkier -- your preference).


Some people like to add a bit of sugar, cinnamon, or even cinnamon red-hot candies -- but I just like it plain. (I also tend to can my applesauce, which is why this photo depicts the sauce in canning jars.) But fresh applesauce is easy to make and can be refrigerated.


Rice. No photos, sorry, but to cook basic white rice, use a 2:1 ratio of water:rice. For example if you want to cook two cups of rice, put two cups of water in a pot, let the water come to a boil, add one cup of white rice, turn the temp down to simmer, cover, and let cook. It takes about half an hour or so.

Muffins. I decided to make muffins for breakfast this morning and use the photos as a tutorial. (For our family, I always double the recipe.)


Mix all the dry ingredients together -- flour, sugar, baking powder.


The wet ingredients also should be mixed separately. Start with the eggs...


...and give them a quick scramble with a fork.


Then add the other two wet ingredients (oil and milk). The two bowls of ingredients are now ready to mix together.


With muffin batter, don't try to get the lumps out. Make sure everything is moistened, but it's not supposed to be smooth. (No idea why.)


Now mix in the blueberries (in this case, some of the ones I picked last summer).


You can either grease the muffin tin, or use paper cups.


Doubling the recipe gives me about 15 muffins on average.


Now here's a little trick for novice cooks: If you have vacant cups in a muffin tin, fill them about half-way with water. This keeps the tin from warping due to uneven heating. This means you have to be careful when putting the tin in the oven, and especially when taking the tin out of the oven, since the water will be boiling hot.


Depending on your oven temp (as well as how brown you like them), the muffins should be baked anywhere from 20 to 40 minutes.


Showing how to make muffins took a long time, but consider: homemade muffins only have six ingredients (seven, including the blueberries) and takes no time to whip together.


And the results are mouth-watering!


In future blog posts I'll do tutorials on making pie dough and pizza from scratch, but I figure this would be a good start for those who are learning scratch cooking.

What are the benefits of scratch cooking? Once you have your basic kitchen implements as well as ingredients such as baking powder, vanilla, spices, baking soda, etc., then staples such as flour, sugar, rice, beans, etc. can be bought MUCH more cheaply and last MUCH longer than the boxed counterparts. And there's no comparison when it comes to taste.

So here's an opportunity for all scratch cooks to post their "boxed stuff" recipes. If you have a blog tutorial, post the link as well. Let's spread the word about the benefits and ease of scratch cooking!

Addendum:

Debbie in Massachusetts sent in her recipe for pancakes.

Pancakes:
1 1/2 cups flour
1/2 tsp salt
2 tsp baking powder
1 tsp sugar
3 tblsp melted butter
2 eggs
oil or butter for cooking
1 1/4 cups milk (I use powdered milk.)

Mix dry ingredients. Stir in wet ingredients. Cook as you would store-bought.

Pancake stretchers:
1). "Supper pancakes" -- add 1/2 cup cornmeal and a can of whole kernel or creamed corn to batter
2). 2 apples cut up & diced
3). Raisins, cinnamon & vanilla
4). A banana
5). Chocolate chips (w/ or w/o peanut butter)
6). Blueberry
7). Honey, cinnamon & nutmeg
8). Leftover oatmeal
9). Leftover cream of wheat

Debbie from MA