Here are the steps for making cheddar cheese. The recipe for this version came from Ricki Carrol's
Home Cheese Making. Some of these photos will be used to illustrate a comprehensive article on basic cheesemaking that will appear in a future issue of
Backwoods Home Magazine. I'm posting them here so the editor has a chance to look over the pictures and select the ones she wants to use for the article.
The beginning steps for cheddar are similar to the beginning steps outlined in mozzarella cheese (illustrated
here). I'm not giving temperature specs, etc., as those details are found in the cheese recipe in the book. Instead, I'm just illustrating some of the basic steps.
In cheddar, you don't use
thermophilic starter, you use
mesophilic starter. Nor do you use lipase powder or citric acid. It's just milk, mesophilic starter, and rennet.
For cheddar, I go through similar steps as with the mozzarella - warm the milk, add the starter, let it ripen, add the rennet, let it set, cut the rennet, slowly heat the temperature to 100F, drain the curds in a clean pillowcase...all that is nearly identical to mozzarella (except for certain minor temp differences and ripening times detailed in the book).
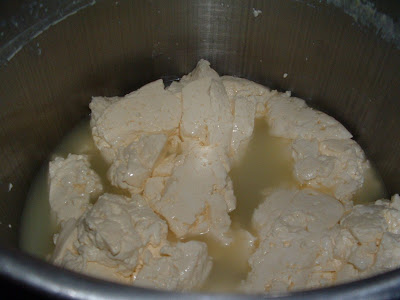
The one big difference is, before cooking the curds for two hours, you don't dice the curds, you cut them into big three-inch slices. Here are the sliced curds, back in the pot:
Cook the curds at 100F for two hours, turning every 15 minutes, until they're tough and resemble pieces of boiled chicken breast.
Here's where things diverge from the mozzarella technique.
Take the tough curd pieces and dice them, then put them back in the pot. Maintaining the temperature at 100F, cook for 30 minutes, stirring gently with your fingers every ten minutes to keep the curds from matting. Then add the salt and stir to dissolve.

At this point you will need a cheese press. Unlike the shiny pretty (and expensive) commercial presses, I use a home-made lever-arm press my husband put together. (I'm so thankful to have a woodworking husband!) Here is the press; at the bottom right are the plastic (purchased) form and follower; at the upper left is an old plastic jug filled with sand and bent nails, as a counter-weight.

Don made the base of the press wide enough to accommodate the size of the plastic form. By the way, while I normally advocate home-made versions of whatever you can make, I do recommend purchasing a proper cheese form and follower. They're tough sturdy food-grade plastic and
only cost $16 and will last forever.
Anyway, put the form on the press and line it with a piece of old clean sheeting (I prefer "thinner" sheets rather than "thicker" sheets, as it allows the whey to drain more easily).

Spoon the curds into the form. Press down and squish them all in if necessary.


Gather all the edges of the cloth and pack it into the form, over the top of the curds. Put the follower into the form.

Put the...I dunno, what do you call it? The "foot" of the press? Whatever it's called, put it into the follower. You'll notice whey is starting to get pressed out of the curds.

Be sure to put something underneath the edge of the cheese press to catch the drippings. Normally I put my press on the edge of the sink and let the whey drip into the sink, but that didn't really photograph well, so instead I propped my press on top a crate on the kitchen table. Do whatever arrangement works best for you.

Put the counter-weight over the lever arm of the press and push it up to ten pounds. Keep it at this weight for fifteen minutes.

Slide the counter-weight off the arm, lift the foot off the cheese, take the follower out, and flip the cheese over. Replace the follower, fit the foot back inside, and press at forty pounds for twelve hours.

Flip again, and press at 50 lbs for 24 hours:

At the end of that time, remove the cheese from the form and peel off the cloth:

Let the cheese air-dry for 3 to 5 days. I like drying cheese on a rack so it dries evenly on all sides.

Here I'm waxing several batches of cheese at the same time. At this stage, they're half-waxed...

And fully waxed. I'll date it and let it age for 2 1/2 months.

A word about cheese cultures, either thermophilic (for mozzarella) or mesophilic (for cheddar). The cultures come in powdered form, and with care they can be recultured indefinitely. Start by sterilizing some jars. Then fill the jars with milk and sterilize it by boiling in a boiling-bath (in effect, canning the milk). Let the milk cool to 110F, add the starter, and let it sit out at room temperature for twenty-four hours to culture:
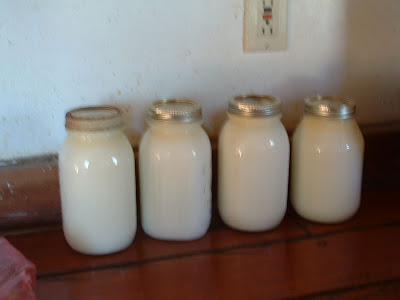
I'll freeze this in ice cube trays after it's cultured, and then I just take three or four cubes for culturing cheese. Hint: LABEL your mesophilic and thermophilic cultures. I have a bag of mystery starter cubes in the freezer with no clue what kind it is.


