Showing posts with label making butter. Show all posts

Wednesday, July 23, 2025

Making butter

Ever since we started milking Maggie, I was looking forward to trying one of our more cherished acquisitions: A butter churn.

This marvelous contraption has been parked on top of our hoosier for about two years, ready and waiting.

This butter churn is pricey – somewhere on the order of $200 – and as far as I know, it's only available at Lehman's (which I believe manufactures it). I've been coveting this churn for a long time. About two years ago, I proposed to swap some writing for it, and the swap was accepted.

And then there it sat: Waiting, waiting, waiting...

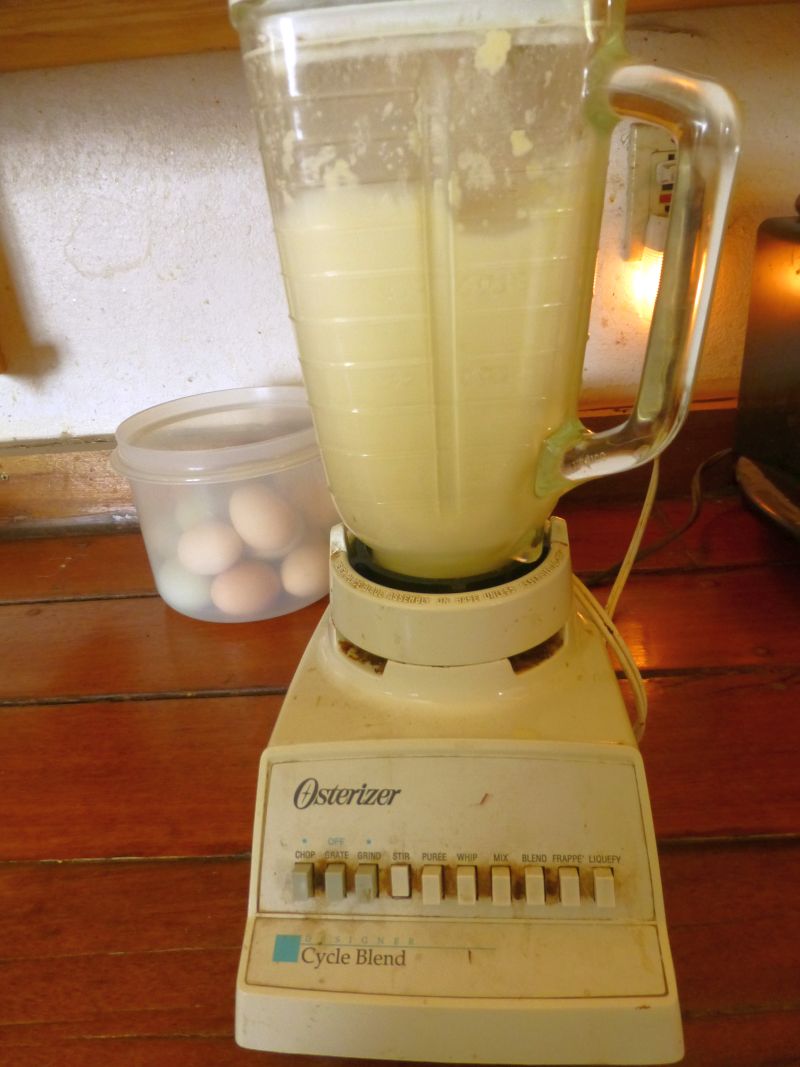
At last I had the opportunity to try it. I had saved up a bit under a gallon of cream, then let it sit on the kitchen counter overnight to "ripen." (This is the second of two half-gallon jars; I didn't think to photograph both jars together until too late.)

I churned the butter in two batches, since the gallon jar of the churn isn't supposed to be more than about half-full (to give everything room to expand).

The handle of this churn turns easily. I timed it: It takes 12 minutes to churn the cream into butter.

I poured and scooped everything into a cloth-lined colander.

Then it's time for the most tedious and time-consuming step: Washing the butter, which gets rid of the buttermilk. (Yes, buttermilk can be saved for other purposes, but I didn't do that this time. Keep in mind fresh buttermilk is different than the cultured buttermilk available commercially. It's very thin and milk-like, rather than thick.) At this stage, the butter is very loosey-goosey, and since it's hydrophobic, it's a matter of endlessly filling a bowl with cold water, squishing the butter around, then pouring off the water/buttermilk combo. Rinse and repeat, literally. Again and again and again.

Can you see the cloudiness of the liquid? That's buttermilk still coming out of the butter, making the water look white.

This is the point where I use another Lehman's tool, one I purchased on my first visit to the store: A curved butter paddle. This is an aid for pressing buttermilk out of butter. It's been sitting in our hoosier for ten years, waiting its turn. Now at least I could put it to use. (It works great!)

Washing butter takes about 30 or 40 rinses until the water runs clear. After that, it's a matter of squishing the butter to extract any remaining water.

From this batch, starting with about 1.75 quarts of cream, I got about 2.25 lbs. of butter.

By some suggestions, butter should be left out for another few hours, then worked again to pull out any remaining water. I covered the butter with a plastic bowl cover during this time.

Then it was time to wash up.

The next morning, I pressed the butter one last time to extract any remaining water, then added salt. I kept forgetting how much salt to add, so I finally wrote it on a tiny piece of tape and stuck it on the kitchen window frame: 3/8 teaspoon per pound.

For what I don't put in the fridge for immediate use, I freeze. For freezing, I plop about half a pound of butter onto some waxed paper, wrap it, and slip that into a plastic bag, which I then tuck into the freezer.

All spare cream is going into butter at this point. (I'm not making cheese yet; I still need a cheese press!) Homemade butter is delicious and easy. I'll make all I can – while I can.

Thursday, May 28, 2015

Blender butter

Since I've been milking Polly every day, I've been getting about 1.25 gallons each morning. Needless to say, this stuff stacks up in the fridge. I haven't made any cheese for awhile because I'm out of starter culture and need to cultivate more; so until then, I've been skimming the cream and making butter.

I don't know why it didn't occur to me to put up a blog post about the process until I was halfway done with this latest batch, but there you go. So I apologise for not showing the eight or so gallons that were stacked in the fridge, or the process of ladling the cream into a large pot. But suffice it to say, I ended with this large pot (which holds two gallons) full of cream.


I heated it slowly to 60F.


For whatever reason, when cream is warmer or cooler than 60F, it takes too long to churn; but right around 60F, it churns quickly and easily... especially if you churn in a blender, which I do for the sake of convenience.

The blender shouldn't be more than half full, since it increases in volume during the churning process, plus it needs room to splash around.


It takes maybe a minute (or less) for cream to churn to butter in the blender. You can "hear" when it's done because the motor changes tone as the contents become thicker. This is what it looks like after it's churned. Butter floats on top, buttermilk is at the bottom.


I line a colander in the sink with a large piece of clean sheeting, about 2x2 feet square, and pour the liquidy butter/buttermilk into the colander.


The colander will hold the contents of two bouts in the blender (this photo shows just one blender's worth).


When I've churned twice and dumped everything into the colander, it's time to squeeze out the buttermilk. You can save the buttermilk if you like, though I don't bother. It's not like the thick buttermilk you find in grocery stores, by the way. That's cultured buttermilk, which this isn't.

Gather up the corners of the cloth...


...then squeeze downward. I prefer "thick" sheeting rather than "thin" sheeting for this purpose. If the fabric is too thin or loose (like cheesecloth), it will squeeze out the butter along with the buttermilk.


After that, move the sheet over a large bowl...


...and strip the butter downward off the sheet into the bowl. It's messy, but the butter is so softy and liquidy it's very easy.


Repeat this process until the cream is all gone. I am able to set up a comfortable rhythm: While I'm stripping butter from the cloth, another batch is churning; then I dump the churned butter in the colander and set up another batch to churn while I squeeze and strip the butter, etc.

At the end, this is what the butter looks like. It's very watery and loose and bears little resemblance to the finished product.


The next step is to wash the butter. It's necessary to wash all the buttermilk out of the butter, or it will go rancid very quickly.

Run COLD water into the bowl...


...and start working the butter -- squeezing and flattening, squeezing and flattening.


The water will quickly get cloudy, and you'll feel the butter start to firm up.


Pour off the water and refill the bowl, always using cold water. I like to pour off the cloudy water over a colander, because sometimes little bits of butter get poured off too.


Repeat this process for as many times as necessary until the water comes clear - maybe nine or ten times. You can expect anywhere from 2 to 3.5 pounds of butter from two gallons of cream. This time I got 3.5 lbs, calibrated for the weight of the bowl.


The next step is to salt the butter. Salting isn't necessary, though it does improve the flavor and helps preserve it. Most instructions for making butter call for waaaay too much salt, in my opinion. Through trial and error, I've found one teaspoon of salt for three pounds of butter is just about right. If I had only one pound of butter, I'd add 1/3 teaspoon.


Sprinkle the salt over the butter and work it in until you can't feel the graininess of the salt any more. You'll probably work out a bit more water during this process, so just pour it off.

Then the butter is done. Since 3.5 lbs is more than we will use in the immediate, I froze the excess. I tore off three sheets of waxed paper and laid them on the counter, ready, then weighed out a pound of butter.


The butter is still very sloppy and loose since it's at room temperature, so I plop it onto the waxed paper and carefully roll it into a ball within the paper, tucking the side tails of the paper under the ball. This left me with half a pound left over, which I put in the fridge for immediate use.


I like to slip each pound of wrapped butter into a plastic Ziplock bag as well, before freezing.


That's all there is to making butter. From start to finish, including cleanup, takes about an hour. By the way, you'd think the piece of fabric I used to drain the buttermilk would be a mess to clean, but it's not. Under hot water, it's quite easy to rinse off the remains of the butter, after which I put the cloth in the wash.

As I see it, knowing how to make butter is just one more step toward self-sufficiency. After all, you can't get much closer to the cow than homemade butter.

Oh, and let's not forget... this butter is EXTREMELY RARE AND PRECIOUS, according to this article. LOL.

Friday, October 11, 2013

Making butter in a blender

I'm getting lots and lots of milk from milking Matilda, so I'm in full dairy mode: cheese, yogurt, and of course butter.

There are endless ways to churn butter -- agitation is the sole unifying component -- so I use my blender to make it quick-n-easy.

I like to wait until I have a gallon and a half or two gallons of cream before making butter.


For whatever reason, cream seems to turn to butter much quicker if it's warmed to about 80F. If the cream is too cool or too warm, it takes muuuuuch longer to turn to butter.


Here it's a bit over 80F, but not so much as to make the churning too inefficient.


Once the cream is warmed up, I use a measuring cup as a scoop to pour the cream into the blender. I don't fill the blender more than half-way.


I have an older blender, which has two types of settings. On one type of setting, I have to keep manually pushing the button for the blender to say on. With the other type of setting, the blender stays on automatically. (I don't know if newer blenders work this way.) I put the blender on the lowest setting it will stay on by itself, which is "Stir."


The cream only has to blend for a couple of minutes. At the end of that time, this is what it looks like.


I line a colander with a clean cloth. Unlike the thin squares of sheeting I use for straining milk or making cheese, I prefer a tighter, stouter weave of cloth for making butter. This is because I have to force the buttermilk out through the cloth. With thinner cloth, the butter also gets forced out, which isn't good.


Pouring the blender contents into the colander. I usually save the buttermilk since the dogs love it.


The buttermilk doesn't drain easily, so I gather the edges of the cloth together...


...and, starting at the top of the gather, squeeze downward. The butter stays inside the cloth, the buttermilk is squeezed out.


By the way, the buttermilk that results is very thin and nothing like the thick creamy buttermilk you buy in stores. That's cultured buttermilk. You can buy cultures to make cultured buttermilk out of plain buttermilk; but since I don't like to drink buttermilk, I don't bother. The dogs (or chickens) are happy to get it.

After the buttermilk is squeezed out, I open the cloth and strip the butter into a bowl. It's very loose and soft at this point, almost unrecognizable as butter.


Meanwhile, while I'm squeezing and stripping, I have another batch of cream in the blender, churning. It makes for a nice rhythm: by the time I'm finished squeezing-and-stripping, the next batch of butter is done. I pour it into the cloth, put some new cream in the blender, and repeat the process until all the cream is churned.

By the end of this process, here's what the butter looks like -- a watery mess.


Now comes the laborious part of washing the butter. All the buttermilk (the cloudy liquid) has to be washed out, otherwise it will make the butter go rancid. So I put the bowl in the sink and run some cold water into it. Then I squish squish squish the butter, pressing it flat against the bottom or sides of the bowl, squeezing and shaping. The water will get very cloudy.


There are butter paddles available to help this process, but I haven't been able to find any in antique stores. I may ask Don to make me one.


I pour off the cloudy water and add fresh cold water. The coldness of the water helps to harden the butter. I repeat the process of squishing, pressing, squeezing, and otherwise working the buttermilk. The water quickly clouds up. I pour it off and repeat the process perhaps another fifteen or twenty times until the water runs clear. Then I pour off the water for the last time.


After this, it's time to add salt. You can keep butter unsalted, but surprisingly it tastes very bland that way (although it's otherwise perfectly fine). How much salt to add? I've read various sources that recommend something like a tablespoon of butter per pound. I've tried that, and the result was eye-wateringly salty butter. After some experimentation, I only add a quarter-teaspoon per pound (or a half teaspoon for two pounds, which is what I ended up with). Sprinkle the salt over the butter and start working it in. I also take this opportunity to squeeze out any excess water.


So how much butter do I get? The usual rule of thumb is a pound of butter per gallon of cream.


In this case out of a bit under two gallons of cream, I got about 2 1/4 pounds of butter.


Eventually I want to segue to non-electric butter-making options. The old paddle-in-a-jar type of churn, such as this one at Lehmans.com, cost an arm and a leg. Even used or antique ones are wildly expensive.


Don says it wouldn't be hard to make a rocking churn, a smaller version of the one mentioned in Laura Ingalls Wilder's Farmer Boy.


There are probably easier ways to make butter, and I'm happy to hear any of them.