Don found this meme. Very apropos.


Too often, homesteading articles, blogs, websites, and videos (including this one – guilty!) show only the successful side of homesteading. The abundant harvest, the completed projects, the fresh eggs and baby chicks and overflowing milk, the healthy livestock ... by golly, this lifestyle must be easy-peasy, right?

Yes and no. Of course things go right. And of course things go wrong. But what is seldom shown is the nitty-gritty day-to-day dirty side of homesteading, including the daily chores that must be done for the comfort and welfare of animals. For that reason, I thought I'd show you something I do every day, rain or shine; namely, cleaning the barn.
This, dear readers, is what the barn looks like on a typical November morning. Lovely, n'est-ce pas?


The mess includes puddles of urine, which tend to concentrate at one end of the barn (the building may have a slight slope to it).

The regular weapons in this fight against a messy barn include a dedicated rake and flat-edged shovel...

...and a dedicated wheelbarrow.

I work from one side of the barn to the other, starting with the milking stall (left) and calf pen (inner right).

Stormy, who is the calf of our milk cow Maggie, spends the night in the calf pen, so I make sure it's as clean and cozy as I can make it every day. This means raking out soiled hay and manure, scrubbing and refilling her water bucket, giving her a bit of grain (as an enticement), and making sure she has a pile of fresh hay for feed.

Here's the soiled hay and manure I removed from her pen.

After the calf pen and milking stall are cleaned out, I mentally divide the barn flood into six "quadrants." I clean one or two quadrants at a time, working my way toward the other side.

(Yes, the barn mats are a mess. We know that.)


By this point, the wheelbarrow is ready to empty for the first time. I usually have between two and three full wheelbarrows each day.

Here, I have the remainder of the barn waste accumulated in one corner.

Halfway through the process, I'm warm enough to discard my coat and scarf.

Time to fill up another wheelbarrow.

Once that's full...

...I cart it out to the waste pile.

Never undervalue a barn waste pile! Barn waste becomes compost, and compost is just about the perfect food for the garden. Believe me, we view the pile in the photo above as black gold.
Still, you can understand why this chore requires boots.

Cleaning up the barn waste is the hardest and heaviest work. Once that's done, the chore gets easier.
The next task is to clean and refill the calf's water bucket, which tends to get messy overnight.

I give the bucket a quick scrub...

...then refill it with fresh water.

Since I'm at the water tap anyway, I confirm the big tank is full. Here in mid-November, we're still able to use the float valve. When freezing weather comes, we'll remove the float valve (which would otherwise freeze) and insert a stock tank heater, at which point we'll have to manually fill the tank morning and evening.

I had been banging around the barn, inside and out, for about half an hour, without disturbing the two does that were lying down a few yards away. Deer are extremely common here, and these animals know we're not hunters and therefore not a danger to them. These two ladies stood up when I got within about twenty feet of them, but they were barely alarmed.


After filling Stormy's water bucket, it was time to sop up the puddles of urine in the barn. We do this with sawdust. Older Daughter's shop is on the other end of the barn, so she routinely shovels sawdust into a garbage can for me.

On a shelf inside the calf pen, I keep a number of necessities: A wind-up lamp, my milking crate, Maggie's leg hobble, scrub brushes ... and sawdust (in the white bucket on the left). This bucket is kept brim-full at all times. If I'm milking and Maggie suddenly urinates in the milking stall, believe me when I say I need sawdust fast. I toss it liberally over the wet mess and it sops it right up. I never want to get caught milking without that bucket full of sawdust handy. (It's amazing the sheer volume of urine a cow can unleash.)

During afternoon cleaning, I apply sawdust to the barn floor as well, putting an extra amount anywhere it's especially wet. It gets shoveled up during the next day's cleaning and added to the waste pile.

Then I top off the bucket with more sawdust, and return it to the shelf in the calf pen.

Next it's time to put out grain for Maggie and Stormy.

We used to give grain to all the animals, which trained them to come into the corral at night. However, gradually, all the animals sort of ... lost their taste for it, I guess. Now we don't bother graining Romeo (our young steer) or Mignon (our yearling heifer), since most of the time they just ignore it anyway. We still make a scoop of grain available for Maggie in the evening, but for the last month or so she hasn't wanted it. She will, however, eat a scoop in the morning when I milk her, and Stormy enjoys about half a can (shown in the photo above), which entices her into the calf pen each evening.
Next I give Stormy's pen a pile of fresh hay for eating (piled on the left),and her pen is ready. Of those two white buckets, grain is in the left bucket and water in the right.

Normally this is where I finish the daily barn cleanup. However about once a month, I clean up the duff that tends to accumulate on the floor between the hay bale and the feed boxes.

This material is too small and choke-y to feed the animals.

So, using a push broom, I sweep it into a pile...

...and then pull that pile through the gate into the livestock side of the barn, and spread it out.

Now the barn is clean and ready for livestock. The whole chore takes about 45 minutes to complete.
The very last thing I do is close the milking stall and calf pen gates. Otherwise, when the animals come in for water mid-day, they would eat the grain and hay, and foul the fresh bedding in the calf pen.

This, dear readers, is one of my daily chores. Some people react to manure and think "Ewww, cOw PoOp" and refuse to have anything to do with such tasks. But for me, it's just something that has to be done, and it's no more onerous than any other household task that needs doing.
In fact, by some measures it's the ability and willingness to do these dirty chores – day after day, cheerfully and without complaint – that will help determine whether someone is cut out to have a homestead.
Last week's Book Review Monday was in response to a reader question: "My daughter and her husband have purchased small acreage and are beginning their homestead journey. Both are city kids with no gardening or farm experience. Can you recommend a good book for beginners? Thanks."
We recommended several books, but decided to space out additional recommendations since we didn't want to overwhelm people. But needless to say, we have an extensive library of homesteading books.
Which is why I found it so funny when one reader commented as follows: "Another good reference is the old 'Back to Basics' book by Readers Digest, it's been republished since by another place, but full of good info."
I found this funny because this was one of the books we'd pulled out to review, then put back on the shelf until this week. But this reader is correct: "Back to Basics" is a phenomenal book. I've owned this copy since the 1980s.

It's kind of the "Ball Blue Book of Canning" of homesteading books: Beautifully illustrated and thorough, but not as intimidatingly comprehensive as Carla Emery's "Encyclopedia of Country Living."
Reader's Digest no longer prints this book, but it's now available in another format. The contents are identical.

Here is the Table of Contents (in my older copy):

See? Just beautiful.

Highly recommended.
Our next suggested reference is a new addition to our homesteading library, although it was published in 2011. This was a book we picked up at a tiny spot on the map called Silver Star, Montana at a place called Granny's Country Store. At the time we stopped in, Granny was out, and her son (whose name we regrettably missed) was packing up a significant portion of the inventory to attend a show, but the book selection in the store was still excellent.

One of the books we purchased is called "Homesteading in the 21st Century: How One Family Created a More Sustainable, Self-Sufficient, and Satisfying Life" by George Nash and Jane Waterman.

This couple has an impressive background in hippie living (interpret that as you will), but unquestionably their book is highly informative and reflects an imposing range of skills.

I would recommend this book without hesitation to beginning homesteaders.

Don's book recommendation is a practical manual called "How to Build Animal Housing: 60 Plans for Coops, Hutches, Barns, Sheds, Pens, Nestboxes, Feeders, Stanchions, and Much More" by Carol Ekarius.

Don's observations: "I own a lot of books about building construction, including those books dedicated to farm and ranch construction (I'll post more of these if you want). Some are just picture books for ideas, and others require that you understand construction at a more advanced level. This book fits well in between those extremes. It makes understanding the basics easy: Simple to complex foundations, small projects (from hutches to pens), all the way up to milking barns and stables. It also provides instructions on layout, air flow, simple electrical systems, and a lot more."

"Every homestead need outbuildings. This book will be a big help in deciding what you want."

(Obligatory disclaimer: This post contains affiliate links. As an Amazon Affiliate, if you purchase through those links, I earn a small commission.)
Happy reading!
Don found this online: a war-era (1940) poster encouraging people to grow food:

In this era where governments are doing everything possible to shut down large and small farms (here and here, for just two small examples), which of course jeopardizes the food supply, this seems almost phenomenally wise.
A closer look at the fine print reveals the advice to "Grow vegetables and fruits if your soil is fertile and sunny" and "Can or preserve surplus perishables" and "Keep a flock of hens if your soil is not suitable for gardening."
Can't argue with these wise words. Everyone would do well to heed them ... despite government opposition to the basic human concept of feeding ourselves.
This is a loooong post, so grab a cup of tea and follow our journey toward blueberries.
Last year, you might recall I went on a hunt for blueberry bushes. They were one of the first things I wanted to get established here in our new home, but there was a regional shortage at the time and I was worried I wouldn't be able to find enough.
Fortunately, from a variety of sources, I was able to obtain the bushes I wanted: 15 Chandlers, six Toros, three Patriots, and five Spartans (originally six, but one died), for a total of 29 bushes.

For the longest time, these bushes remained in pots on the porch (where they were protected from deer) while we figured out where to plant them and how best to protect them.

We had also purchased four peach trees, and were faced with a similar question: Where to plant them and how to protect them.

A major consideration around here is deer pressure. We have deer everywhere. When we finally get our raised-bed garden installed, we plan to have 10-foot-high fencing around it, but last year we had nothing established by way of infrastructure to protect the bushes, and of course we couldn't delay too long in getting the berries into the ground.
So after much deliberation, we decided on an unorthodox solution. (Hmm. It seems most of our solutions are unorthodox.)
We have a strip of lawn in front of the house, parallel to the driveway. We're limited in what we can do on this spot, because a portion is part of the drain field for our septic system. Fortunately we are able to tell (from the unevenness of the ground) where the drain field ends, and we decided to put the blueberries and peaches there.
Don laid everything out in a schematic.

We assembled the early tools we needed: stakes, tape measures, marking string, and spray paint.

We staked out where we were going to drill holes with the tractor auger, both for planting blueberries and peach trees, but also for constructing an enclosure to protect everything from the deer.
Measuring and marking.


Don made a spacer board to mark where to auger holes for blueberries, to keep things fairly even.

The spray paint indicates where the holes will get augered.

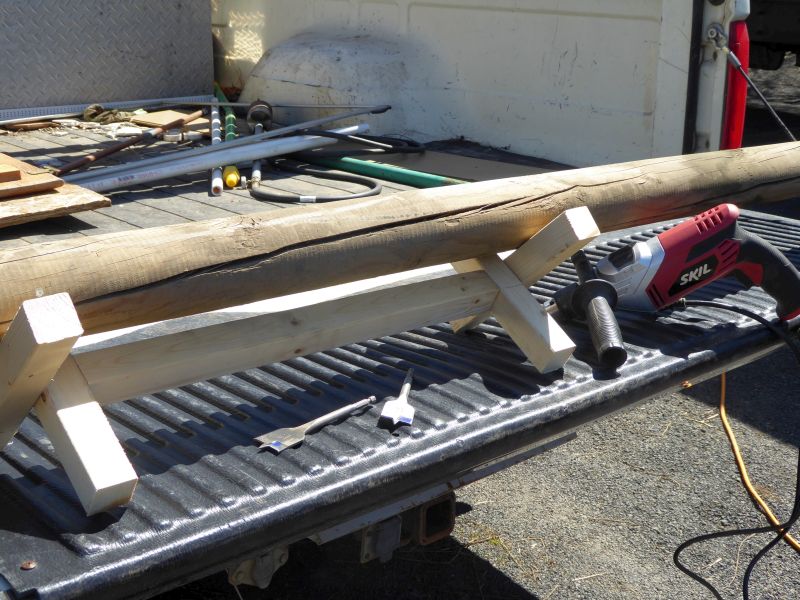
Once all the preliminary layout was done, it was time to begin the enclosure to protect against deer. We had already salvaged some pressure-treated poles.

These poles were a lucky (and free) find. Hard to beat that price. We decided they would become the uprights to hold fencing in place for the blueberries and peach trees.

We laid out the space where we wanted to place the poles, and augered holes using the tractor auger.

Then he augered the holes to plant the blueberries.

But building the protective enclosure was more important than planting at this point, so Don focused on getting the poles into the ground.
First he made a quick jig to hold the poles in place.
He measured and marked two inches from the ends of each pole.

Then, using a paddle bit, he drilled holes.


Then we set the poles upright in the ground, with the drilled holes at top.

We used salvaged well pipes to link the poles together. Well pipes are one of the homesteader's best friends. They're often free, they're 21 feet long, and they can be threaded together. We threaded some of the pipes through the holes in the poles. (That's our internet satellite dish on the right.)

We made sure the poles were level.

Tamping the poles in place.

We could thread the well pipes together to make the lengths we wanted. Plumber's wrenches helped.

(So did a little grease.)

The result was a series of poles linked by metal rods.

(If all this seems very convoluted and mysterious, bear with us. There's a method to our madness.)
We only put in about half the poles and pipe we wanted to create the enclosure, just enough to plant the blueberries. But to get ready to plant the peaches, we brought in a neighbor who has a small Bobcat trackhoe to dig us some holes.

Here's one of the holes.

To the pile of excavated dirt, we added sand to break up the heavy clay.


Don churned together the dirt and sand using the rototiller attachment on the tractor.


Once it was all mixed together, he backfilled the hole with the dirt/sand mixture. These will be our peach-tree planting spots. We then continued constructing the line of upright poles and pipes to the end of this line, to enclose the spots we'll plant the trees.

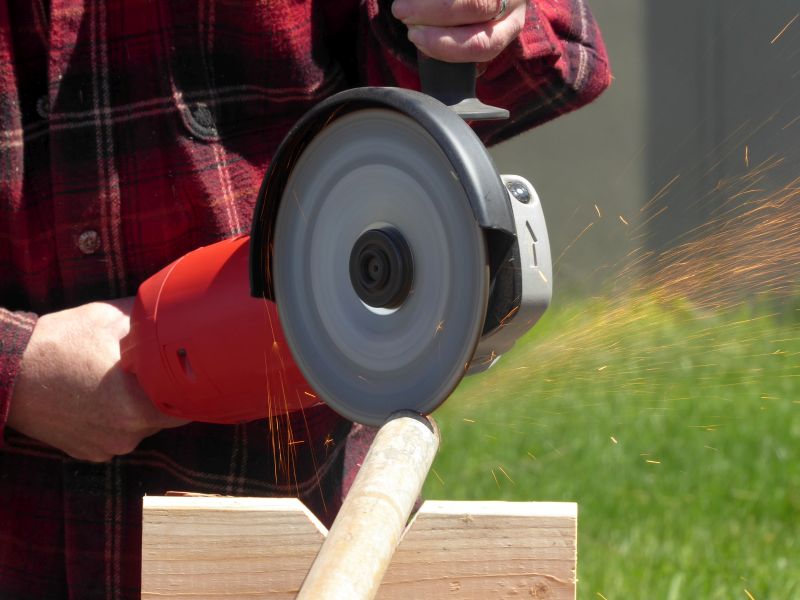
To make the enclosure sturdy, however, we needed to brace the upright poles. To do this, Don cut pieces of well pipe at an angle to use as braces. He started with a jig setup.

This is the end of the well pipe he'll be cutting with a metal-cutting wheel.

Here's his metal-cutting wheel.

It's a pity the photo barely captures the cascade of sparks that went flying every time he made a cut. It was quite dramatic.
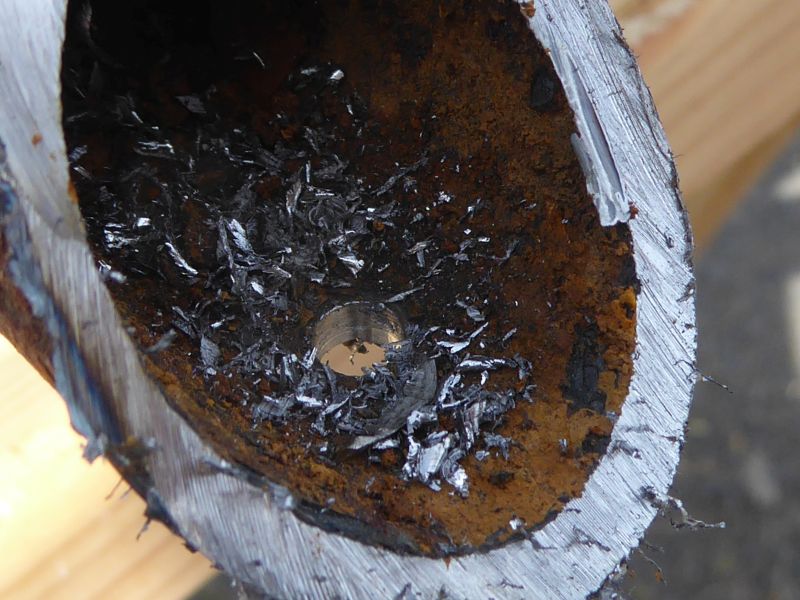
Once he had all the pipe cut to length, he drilled a hole in the long end of the angle, about an inch from the tip.

(Close-up of the drilled hole, complete with metal shavings.)
Each upright wooden pole got two metal braces screwed into it.


This is the (still incomplete) result. The angled braces serve two purposes: they brace the pole, but they also act as a support for the siding.

For the siding, we used cattle panels (some people call these hog panels).

These were leaned up against the angled pipes.

Finally it was time to actually plant the blueberries. We carefully prepped the holes with a generous amount of peat moss, which gives acid-loving blueberries a boost.

I brought all the blueberries down from the deck...

...and organized them according to variety.

Don even made a small chart showing what was planted where.

In the ground.

Then I laid out some weed cloth and started fitting it around the blueberry plants.


Crucially, however, I did not anchor the weed cloth with gravel. Big mistake! We didn't have any gravel at the time, and we naïvely assumed the weed cloth would be sufficient to, well, block the weeds. (It wasn't.)

To complete the enclosure, we used sturdy deer netting.

This we cut to length and draped over the pipe at the apex of the structure.

This is what the enclosure looks like. The cattle panels can drop down for access to the berries, and the angled cattle panels combined with the netting keep the deer from even trying to get in. (Deer don't like to mess with angles.) The height at the apex is high enough that we can walk inside without banging our heads, though admittedly this is because we are a family of hobbits.

But this is where things stalled. Big-time. The temperatures were getting roastingly hot by this point – last summer wasn't much more than a blur of heat that seemed to last for months – and early mornings were being used for other projects. As a result, only 12 of the blueberry plants got any weed cloth at all, and what was there wasn't anchored with gravel and therefore didn't do much good.
Bottom line, the blueberries got ignored. Make no mistake, I watered them, but did nothing more for a full year.
This last spring, we were dealing with Don's health situation. Once he was recuperated, he was able to move some gravel for me, and I became determined to mend the mess I'd made with the neglected blueberries last year. The bushes were overwhelmed with weeds and grasses to the point of embarrassment. I mean, look at this!

It's hard to even spot the poor overwhelmed berry bushes.

So I got busy doing what I should have done last year, cursing myself for leaving it so long and thus multiplying the amount of work required. (Ben Franklin said it well: A stitch in time saves nine.)
I started at the end of the line where I had ineffectually laid down that length of weed cloth last summer. I pulled off the cloth and started hand-pulling the grasses and weeds down to bare dirt. The weed cloth did do one thing – it kept the ground softer and made it easier to pull everything out. Still, it was laborious work.

Don had purchased a section of the biggest PVC pipe he could find, then sawed it into chunks to use as collars.

As I cleared the ground around each bush, I tucked weed cloth around the plant base, then fitted the collar and snugged it down.

Relatively speaking, this first section was easy. Soon I had the area paved with weed cloth and graveled.


Then I had to tackle the much longer section that had never had weed cloth over it. The bushes were more stunted here, simply from having sunlight blocked by the tall grasses.
This was much more time-consuming. Don started by weed-whacking what he could, but he had to be very slow and careful not to accidentally hit a bush. (He never did.) That took care of the tallest grasses. After that, I armed myself with knee pads and an electric trimmer and got to work.

I shaved – literally shaved – the grasses down to the ground using the electric trimmer. The blueberry bushes themselves didn't have many weeds growing in the holes where we originally planted them, which was good news. Instead, they were simply overwhelmed by tall grasses. Once these were trimmed down, we could see that not only did all the bushes survive, but they didn't look half-bad (considering). Most had berries.

For each bush, I fit a double layer of weed cloth around it, followed by a collar. Then I laid a double-layer of weed cloth throughout the rest of the section...

... and graveled it.

It took several days of working just in the mornings (when it's cool) to get all the berries done, but the result is splendid.

Until we get a drip system in place, all I need to do to water is drop the cattle panel to the ground, and I can water directly into the collar around each plant. When I'm done, I simply pick up the panel and lean it back against the poles.


It's worth noting that the enclosure itself – the poles braced by well pipes, with deer netting draped over and cattle panels at the bottom – has worked perfectly. The local deer (and elk) population has never even tried to breach these defenses.
As for the bushes themselves, they're producing beautifully. Considering their rocky start, they've been very forgiving.


The young peach trees are next. (By the way, they don't have deer netting over them, of course. Just around them.) They're doing better, simply because they weren't choked by grasses. But they look sloppy, and I don't like sloppy gardens.

So that's our long and convoluted journey toward blueberries. If I had done things correctly from the start, they would have been a lot less work. But at least they're done now.