
I haven't been able to make cheese for several years since I haven't had enough milk, so I figured my cheesemaking skills would be a little rusty. Fortunately making cheese is sorta like riding a bicycle -- once you learn, it's hard to forget.
That's not to say I would ever be without my trusty cheesemaking book. Since getting this book, my cheesemaking has become far more successful.

It offers detailed step-by-step instructions that make the process much more understandable. In this instance, I use the recipe for "Traditional Cheddar."

Cheddar cheese requires a mesophilic culture. I had some cultured, but it was quite old -- dating back a few years to my last cheesemaking endeavors -- but I decided to risk using it anyway.

I've since ordered some fresh starter (mesophilic is for cheddar and other cheeses; thermophilic is for mozzarella and other cheeses; and fresh is for cottage cheese and other cheeses); however I haven't had a chance to culture it yet.

Cheesemaking isn't hard, but it requires patience and the whole day at home. It's a lot of "take this step and wait 45 minutes; then do that step and wait 75 minutes." Not hard, just lengthy.
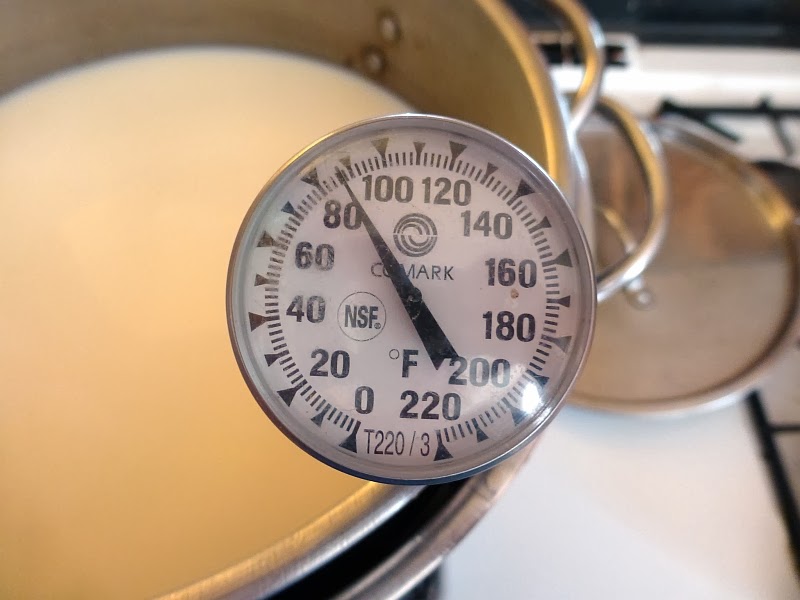
The biggest thing with making cheese is keeping an eye on the temperature. A thermometer is essential.
Anyway, I start with two gallons of whole milk. I nest my pots double-boiler style so nothing burns.

For the first step, the milk is brought to 86F.
Then I added several cubes of mesophilic culture. Because they're older, they're all sorta mashed together and fuzzy with ice but, as I found out, this didn't seem to affect the viability of the culture. It worked just fine.

Stir and let the cubes melt. Once they're melted and the culture stirred in, let the milk ripen undisturbed for 45 minutes.

Then I add rennet. Rennet coagulates the milk and separates the solid (curd) from the liquid (whey). It has two sources, animal and vegetable. Animal rennet is derived from the stomach of a suckling calf who has never had solid food. Vegetable rennet can be derived from stinging nettles.
I use liquid animal rennet, half a teaspoon diluted in a quarter-cup of cool water.

This is thoroughly mixed in, and then left alone for 45 minutes while it coagulates.

After this, the curds have to be cut. I like to use this long slim knife because it's long enough to go all the way to the bottom of the pot.

Curds have to be cut in a criss-cross direction, sliced about 1/2" apart. First one way...

...then cross ways...

...then on a diagonal both directions. This breaks the curds up as evenly as possible in a deep pot.

After the curds "rest" for five minutes, the next step is to gradually heat the curds to 100F over a period of half an hour. Took me awhile to get this step down, as I kept heating the curds too rapidly. During this process, the curds get stirred every few minutes.

When the curds reach 100F, maintain the temperature and stir once in awhile, for thirty minutes.

Then I leave the curds alone for 20 minutes to let them set. During this time, they will sink to the bottom of the pot. See? A waiting period here, a waiting period there... cheesemaking is a long process punctuated by a lot of time doing nothing.

While the curds rested, it was time to get out the cheese press. Long ago, we knew we couldn't afford one of those whiz-bang shiny metal cheese presses ($280!!!), but when Don learned there were plans available (for $5) to make a homemade lever-arm cheese press, he announced "Plans? I don't need no stinkin' plans!" He disappeared into the shop and emerged a few hours later with a handmade lever-arm cheese press. Man, I love my woodworking husband!

He marked the arm with the standard weights I use: 20, 40, and 50 pounds. It turned out I often use 10 lbs. too, so I "wing it" on the arm.
The press has a bucket of sand/gravel/old nails used as a counter-weight.

I needed to make sure the weight was still accurate. So I brought the press outside along with the bathroom scale to test it.

First I tested it at 20 lbs, then at 40.

Yep, still accurate.

By this time the "resting" period for the curds was finished. Time to pour off the whey. Whey can be used to make ricotta, but I wasn't making ricotta this time so I just poured it down the drain.


After this, I set the colander with the curds over the top pot of the double boiler arrangement, to drain for 15 minutes.

I covered it with the lid to help keep the heat in.

At the end of 15 minutes, I flip the curds onto a cutting board with a towel underneath. The curds are still pretty juicy at this stage, and the towel catches the drips.

Then I slice the curds into big chunks, about three inches long.

I drain the whey out of the top pot of the double boiler, and put the chunks of curds back into the pot.

Then comes a two-hour interval where the curd pieces are maintained at 100F. The curds are flipped every 15 minutes. About every other "flip," I insert the thermometer and see how close the temperature is to 100F. At this stage the curds can handle a little fudge factor, so I don't fret if it's a few degrees one way or the other. If the curds are too cool, I turn the gas on low for a minute or two. If the curds are too warm, I pull the top pot out of the double boiler and let it sit on a towel for awhile.

At the end of two hours, the curd pieces are tough and resemble boiled chicken breast meat.

At this point, each piece needs to be diced. I cut lengthwise through each piece before cutting criss-cross.

Put all the diced pieces back into the pot. Cover and maintain the temperature at 100F for 30 minutes. Every ten minutes or so, I stir the pieces with my fingers -- not squeezing, just keeping the pieces from matting together. About halfway through this process, I add two tablespoons of cheese salt. "Cheese salt" is merely non-iodized table salt (apparently iodine can kill the lactic bacteria during the aging process).

At this point I get my form and follower ready. These are tough polypropylene molds. The form (the cylindrical piece) is perforated, and the follower fits snugly inside to press the cheese. While I always advocate for homemade versions of things whenever possible, this is probably one of the few things I recommend buying new, if you plan to make a lot of cheese. It's not wildly expensive, and it will last forever.


I put the form on the floor of the cheese press...

...and line it with a thin piece of old clean sheeting. Some people swear by cheesecloth, but I hate the stuff (it tangles and is hard to re-use). Instead I keep large squares of old clean sheeting on hand for any number of uses, including dairy.

Then the diced curd pieces get stuffed into the form. And I mean stuffed. Sometimes I have to press down to cram it all in, though in this batch it all fit easily.

Then I fold the excess cloth over the top, kinda stuff it in place. The idea is not to have any sheeting hanging over the edge. Makes for a lumpy top of the cheese, but oh well.

Then I fit the follower into the form, compressing both the curds and the wadded up sheeting beneath it.

Then I swing down the arm of the press and fit the foot into the follower.


Then I slide the weight onto the arm. The 10-pound line isn't marked, but we know about where it is. A little "fudging" won't hurt the cheese at this point. The weight stays at 10 lbs. for 15 minutes.

Right away, whey starts squeezing out of the curds. We always position the cheese press so the end tips over an old unused sink, to allow the whey to drain out.

At the end of 15 minutes, I remove the weight and lift the arm, which also lifts the foot. I remove the follower and flip the cheese upside down. Then I reinsert the follower and the foot.

This time I place the weight at 40 lbs.

The weight stays at 40 lbs. for twelve hours. Early the next morning, I flipped the cheese once again and set the weight at 50 lbs., where it stays for 24 hours.
Then I remove the cheese from the press...

...and push it out of the form.

I carefully peel the cloth from the cheese (I can wash and re-use the cloth). Can you see why people say the moon resembles green cheese?

I keep the cheese on a rack for about three days in order to form a rind. The rack allows air to get beneath the cheese to harden it on all sides.

Then it's time to wax the cheese. Cheese wax is different than paraffin wax. It's flexible and won't crack, and it can be cleaned and reused. I got a five-pound block of red cheese wax a few years ago. When it melted (which took hours!), I poured it into this el cheapo tin I got at a thrift store.
To wax cheese, I put the tin of hard wax in a pot of water with a rack on the bottom of the pot, and slowly melt the wax. It will take at least an hour to melt, so here's another opportunity for patience. In theory wax can catch fire, so I keep the heat low.

Once the wax is melted, I lay a sheet of waxed paper next to the wax to catch the drips.

Then I pick up the cheese and dip the bottom half once, twice, three times. I let the wax cool for about ten seconds between dips.


I lay the cheese on the waxed paper, wax side up, for about two or three minutes to cool.

Then I pick it up by the waxed side...

...and dip the other half once, twice, three times.

I managed to wax my fingers.

I left a couple of bare spots, in this instance where my thumb was holding the cheese.

That's where the paintbrush comes in. I just painted wax over the bare spot.


After this I write the date on a small slip of paper...

...and paint a thin coat of wax over it to secure it to the cheese.

I'll age this cheese for about 2 1/2 months. The difficulty is finding a place to store it where it stays at a consistent 55F. I borrowed a neighbor's small dorm-size fridge and set it at its lowest setting, but it's far cooler than 55F, so right now I'm a bit stumped. Thoughts as to where I can find a 55F environment?
UPDATE: Thanks to reader recommendations, shortly after posting this blog post I purchased a used wine cooler refrigerator. It's worked perfectly to maintain the cheese temperature during aging.
A thing of beauty!
ReplyDeleteThanks so much Patrice! A very needed skill and I look forward to making your recipe. A real winner to add to my collection.
ReplyDeleteNow I know why good cheese is so darn expensive!
ReplyDeleteI don't know how you find the time to do all that you do, Patrice. You are amazing!
Small wine cabinets meant to act like a cellar turn up in thrift stores near me every one in awhile. One of those would be ideal.
ReplyDeleteGreat tutorial, thanks!....I too am trying to come up with storage temperature solutions. Time to start experimenting.
ReplyDeleteapparently a wine refrigerator/cooler works like a boss.
DeleteHave you tried a zeer pot?
ReplyDeletehttp://www.greenlivingtips.com/articles/Cooling-food-without-electricity.html
You may be able to manipulate the evaporation rate to get 55F
Nice job! I have never made cheese and can't see me doing so either. Not because I would not like to try, no means......cow/milk supply. I'm just curious, could you have cut the finished product before waxing and had two blocks? How long will the last? Providing
ReplyDeleteyou don't use it all soon in one of your tasty meals!
Kelly in K'ville, NC
I actually just using whole milk from the store. It is certainly not the same as raw milk, but it will certainly make great cheese and is a good way to get into the exercise.
DeleteMy brother does have a supply of milk and has tried to make cheese. Maybe I should get with him.
DeleteKelly in K'ville, NC
When I went to a cheese festival in Vermont a couple of years ago, they said to use a wine cooler refrigerator. Maybe you could find a nice used one that still works.
ReplyDeleteHow exciting! I'm a bit (okay more than a bit) cheese obsessed. I love to come across other people making it too. When it comes to hard cheese, I've been doing mostly Gouda this summer. You make me want to try another cheddar!
ReplyDeleteWould a wine refrigerator have the right temp?
ReplyDeletePatrice, would an incubator be able to be set at a low enough temperature? The other thing that comes to mind is an incubator for bacterial cultures...I know certain bacteria have to be grown at fairly narrow temperature ranges. Perhaps a used incubator on Craigslist or eBay?
ReplyDeleteFran
To get 55 degrees inside the refrigerator you could use a room thermostat placed inside the box set to 55 degrees and use that to control the electricity going to the compressor motor. I have read this instruction to convert a chest freezer to a refrigerator that is highly efficient. I can't remember what they used for the thermostat but can not see what would keep you from using a cheap bymetal type of thermostat.
ReplyDeleteI make a lot of cheese with my goats milk. Unless you have a root cellar use the highest setting on a frige or a room well insulated with a little ac. Also i wipe my cheese with vinegar before i wax it to retard any mold growth under the wax.
ReplyDeleteIf you are going to be making a lot of cheese (and if I had a cow, I would!), you might want to get a wine cooler. They're supposed to hold a constant temperature somewhat higher than refrigerator temps. I checked Craigslist here, and they're available starting at $30.00 Your Craigslist may vary.
ReplyDeleteI have a question, though. I would LOVE to be in an area in which a root cellar would be feasible but here in Florida, it would just be a swimming pool. Is there a possibility that you could ever put one in there? Seems like it would be a great place to cure cheeses.
Actually, cheese cellars (originally caves) were what were used by traditional cheesemakers for humidity and constant temperature. You could use a root cellar I suppose, although I don't know that I would want my cheese aging close to exposed soil. Plenty of small cheeseries are building their own versions - it can be as easy as a square underground box, so long as the temperature is controlled.
DeleteSave the whey even if you don't make ricotta or other cheese. Chickens and dogs love it and it is good for them. Some folks drink it with a bit of lemon for flavoring. If you know someone with pigs whey can cut down the feed cost. Please don't throw it away.
ReplyDeleteI actually drink mine over the next week after I make it - after all, athletes pay good money for powdered whey, why shouldn't I enjoy the real thing? As noted above you can use the whey to make other cheeses - one of my favorites is Norwegian Gjetost (it can also be made from cow's milk whey and is called Msost).
DeleteAgree, agree, AGREE with Anon. @ 7:57 am about the whey! Never EVER toss it out! Here at my house whey goes: into bread making (use whey instead of milk or water); boosts the nutrition of the bread! I also feed whey to my chickens, gets calcium into their systems for better egg shells. Just put a bowl of it in your chicken coop and the hens will drink it up eagerly! Strain your whey well and use it 50/50 with lemonade for a refreshing summer drink. My dogs go NUTS for whey, too. I use it in all kinds of baking and cooking here when I am making cheese from our goats milk.
ReplyDeletePLEASE don't waste the whey!
Hi Patrice,
ReplyDeleteThank you. I really like to see how other people make cheese. I also brush on a coat of apple cider vinegar before I wax my cheese to help prevent mold like Christine. And I always keep the whey for the dog, cats and chickens. It has a lot of protein that is great for them.
As for aging, right now I put my wheels on the bottom shelf of my refrigerator in the back on a towel. It is not the ideal temperature, but is my only option right now. The cheeses do pretty well.
Thanks again. I always learn something by seeing how someone else does things.
Fern
a small wine fridge would work great, i use a six bottle one to hold hatching eggs while collecting for incubation. holds my 60 degree temp setting perfectly, and it can go lower.
ReplyDeleteHow important is it that you age it at 55F???
ReplyDeleteThe reason I ask is that I buy 2 pound blocks of plastic shrink wrapped Monterey Jack and mild cheddar and than age them in my "wine cellar" where the temperature in winter hovers in the low 50s and raises to the high 60s in the summer. After 6 - 12 months aging these cheeses become really good i.e., sharp and much harder/brittle than they were when originally purchased.
Hangtown Frank
Here's an external fridge controller from amazon. You could build one yourself too, but I wouldn't want to risk it with something that will have to be reliable for food.
ReplyDeletehttp://www.amazon.com/Refrigerator-Freezer-Thermostat-Temperature-Controller/dp/B000EXROSE
These types are used regularly for home meat curing chambers.
Would simply cracking the door to the fridge raise the temperature enough, yet keep it cool??? Rather wasteful of energy, but might work till you can get the fridge controller...
ReplyDeleteWould simply keeping the fridge door cracked ever so slightly work to raise the temp where you need it? VERY wasteful on energy, but might work till you get an external fridge controller mentioned above...
ReplyDeleteThe Amazon device is a good price if it works.
ReplyDeleteI would think that a sous vide controller might work as well.
It centers around a PID controller. If Don is feeling electronical you might try that.
A sous vide controller might also be just the thing for temp stability in the heating side of the process. You'd need an electrical source of heat. Most folks use "crock pots".
FWIW, YMMV, yada yada yada. I built one for the wife. It has not been used for the intended purpose yet, but it DOES keep the cat (sort of) away from the stove.
Patrice, have you thought of buying the bulk direct set cultures? Yu inspired me to get a milk cow about 3 1/2 yrs ago. I have milked just about every day since and made massive amounts of cheese. I used to do the mother culture thing but it got to be a hassle. You can buy bulk bags of M and T starter. The bag will culture like 50 cheeses and they are not that costly. Plus they sit in the freezer and last forever. Plus!!! you don't have to worry about them thawing. You just sprinkle over the top, wait 1 min or so, stir and you are ready for the next step!!
ReplyDeleteI have also gotten lazy and I just vacuum seal my cheeses and put them in the fridge. We found that the M starter cheeses got a little too strong in a 55 deg cooler. The T starter ones like ROmano and Parm, no. So now I am back to just letting them age in a fridge and we are really happy with the results.
You should try the Queso Fresco recipe in that book. I make it about every 2 weeks. It is our go to cheese. Takes less than 2 1/2 hrs pot to press and you can eat it the next day. Not a lot of flavor but great for casseroles, enchiladas, tacos, grilled cheese, etc.
Thank you for sharing all your wonderful skills! I think Matilda is a beautiful Jersey girl!
Jani Jeane
Sorry, I have been milking 2 1/2 yrs not 3 1/2.
ReplyDeleteJani
I have the Refridge/Freezer thermostat controller (the one TheLight lists above) on my cheese fridge and it works great.
ReplyDeleteHave you ever visited the cheese forum? www.cheeseforum.org. Lots of cheese cave and other ideas there.
I make cheese and I do use a wine refrigerator. It works like a charm because you can set the exact temperature for your specific cheese. I call it my cheese cave!
ReplyDeleteWhat a fantastic, informative post! It's clear that you really worked hard on this...not only making the cheese, but taking pictures all along the way. The pictures are great and so helpful!
ReplyDeleteI'm doing a whole separate bookmark just for this post! I'll be coming back to this many times for reference, I'm sure. Even the comments are valuable.
I've never made cheese, but your encouragement is infectious.
Just Me
blessed are the cheesemakers.....
ReplyDeleteI have tried using a small wine cooler but I found it difficult to keep the temp constant plus humidity is a pain to keep. I place wet towels in it and a bowl of water but it just dries out very quickly. My next project is to make a cheese cave in my damp, cool basement. I agree with some others that chickens LOVE whey...well pigs get it first here. If I don't have pigs then the chickens get it all:-)
ReplyDeleteMy wife and I have been making a lot of cheese for several years, using our goats milk. We store our cheeses in a small non-defrosting fridge bought at a dept. store for under $100.00. If you rewrap your cheese when you turn it over the first time, you can achieve a much smoother end on both ends. And they will be easier to wax.
ReplyDeleteHi Patrice,
ReplyDeleteMy son is a food scientist and was a cheese maker for several years for Tillamook cheese, and Sorento cheese factories. I asked him to check out your blog and the process that you have used to make the cheese to see if it was similar to the professional factory's.
I also have the same book that you have but havn't used it yet.
He said that your process is great and very similar but just on a micro scale that the big boys use.
The only thing he would change is to age it for several months before use. It's ready when you can shread it without being crumbly.
Great job!
Thank you for such a great blog, and so many usefull topics. I appreciate all the time involved in doing so.
On another note, I was so dissapointed that I could not attend the prepardness expo in Spokane this year because I have an in home business and was booked months in advance. However, I do plan to attend the one this Sunday in Monroe. I hope it's as good as the one in Spokane.
I did attend Spokane's expo last year and loved all the great info.
Becky M
Oh I forgot to say that my daughter and I recently drove out of state to visit the "Portland Homestead Supply" store in Portland Oregon.
ReplyDeleteWhat a great store to find all the hard to find homestead supply items that you might have a hard time finding else where. They just have everything imaginable and a good supply of cheesemaking stuff too. They also have a great new book selection on every homesteading topic, and they even have a section of "books to borrow" for the locals.
We were impressed and even tho it's a long drive for us, we will go back! Just thought your blogging buddies might be interested.
Becky M
I too use a Johnson Controls A19AAT-2 thermostat controlling an old non frost free freezer as my cheese curing cave. A word of caution is warranted if you locate your cheese cave in an unairconditioned space such as your garage or exterior porch. By code, all exterior electrical outlets must be installed on a Ground Fault Interrupter (GFI) circuit. Since garages are frequently also used as “workshops” where power tools might be used, many developers also tie the electrical outlets in the garage to the GFI circuit.
ReplyDeleteThe thermostat works so well that it tends to be a set it and forget it device. You seldom check on your cheese cave except when you are adding or removing cheeses. I learned the hard way that this can be dangerous. We had an early summer thunderstorm that resulted in a power outage when a nearby lightning strike disabled the power line. The utility company had power back on within several hours – and I made the rounds to check that everything was back to normal. I opened the cheese fridge and it was still nice and cool in there. As is typically the case – the interior light did not come on because the thermostat turns the power to the fridge off when it is not calling for cooling. No alarm bells rang. It wasn’t til the following weekend when I attempted to use an exterior power outlet that I realized the GFI circuit had been tripped and the cheese cave had been without power all that time. The power surge that caused the outage had tripped the GFI circuit breaker!! Our steel garage door has a southern exposure so the temperatures in that unairconditioned space must have been well over 100 degrees on some of those Texas scorcher days. My carefully waxed cheeses were all badly melted and deformed. Now I have a nightlight that I leave plugged into the garage outlet to serve as a pilot light that power is in fact on even if the light in the cheese cave does not come on when I open the door.
Goatman in TX
What about an outdoor timer with 30 minute intervals of on/off for the dorm fridge?
ReplyDeleteWhat about an outdoor timer with 30 minute intervals of on/off for powering you dorm fridge?
ReplyDeletejohnson digital temperature controller
ReplyDeletehttp://www.amazon.com/s/ref=nb_sb_ss_i_0_10?url=search-alias%3Daps&field-keywords=johnson%20digital%20temperature%20controller&sprefix=johnson+di%2Caps%2C302&rh=i%3Aaps%2Ck%3Ajohnson%20digital%20temperature%20controller&sepatfbtf=true&tc=1386908354855&ajr=sabc
I had a similar problem with my smoke house being too hot to incubate sausage. I took the t-stat apart and broke off the stop for the dial, now the t-stat will go lower. Maybe your handy husband can figure out how to make that adjustment.
ReplyDeletejohnson temp controller for a lagering fridge. works well for 55*. William's brewing or Northern Brewer both carry them online.
ReplyDeleteI use the same temp controller James suggested. Works great. About $65. Two quick questions. My wheel of cheese was so big that I have to cut it in half in order to wax it. Should I be OK with that? Also, what cheese mold is that you are using? I'd like to get one like that. Again, mine is twice that diameter and so I had a hard time finding the right container to melt the wax and dip the whole wheel in, so I cut it in half to dip. I know I could have painted it, but I thought, it might be nice age both, and then crack in to one before the other. Any thoughts are appreciated. Thanks.
ReplyDeleteJ. Morgan, I looked at your blog post on making cheddar and have a couple of suggestions. First, please note that cheese wax does not put cheese in suspended animation. It will continue to ripen and sharpen as it ages. We've found we like cheese when it's about eight weeks old. Upwards of twelve weeks, it starts to get too sharp for our taste. Several YEARS old? Goodness, it would be inedible!
DeleteCheese can be waxed at any size, so don’t hesitate to break a large round into small pieces. However each piece should be air-dried for two or three days before waxing, to form a rind.
I got my cheese mold from the New England Cheesemaking Supply Company and can highly recommend it. Here’s the link:
http://www.cheesemaking.com/store/p/45-Hard-Cheese-Mold-Small-1.html
Hope this helps!
- Patrice
Breaking large wheels into pieces and aging is not the best of ideas. It DOES compromise the way a cheese ages so I would never do that. Abd certainly trim your "cheesecloth" so you don't have that messy blob on top. Appearance is also important in cheesemaking. And i agree, when you flip the cheese, take off the cloth, turn your cheese and re-dress. This will help to avoid having the cloth stick to the cheese. By the looks of the cheese, i think you need to oress with a heavier weight longer to achieve a better knitting, or composition of the curds. Another thing, thise cultures are very generic meso and thermo cultures that can be used for any cheese. But there are much better cultures out there for specific cheeses. You'll increase the taste by leaps and bounds. Two good places are thecheesemaker.com because he explains what the various cultures are used for. And artisangeek.com has a great selection. Happy cheesemaking, cheesemakers!
ReplyDeleteWhoever said cheddar several years old would be inedible is dead wrong. I attended the American Cheese Society's Conference and Competition in Madison, Wisconsin last year and at the Festival of Cheese, where nearly 1,800 cheese were on display for sampling, there were many years old cheddars. I tried an 8 year old cheddar, it was very complex and dee-lish! I age my cheddars a year at least and some i just let go longer. It's all about experimentation!!
ReplyDeleteOne more thing. Cheese wax. You have to heat up cheese wax to over 200 degrees. This temp will help to kill , any surface bacteria remaining on the cheese. And you have to hold the cheese in the wax for 6-8 seconds to accomplish the kill. Let it cool then re-dip once more or more if you feel like it. I have a crockpot dedicated to my wax. I heat it up on high while monitoring the temp with an instant read digital thermometer and when I'm done i just put the lid back on until next time. This also heats the wax slowly but you have to be careful when you hit the high temp because the fumes and the wax is very flammable. One good thing with a crockpot is no open flame.
ReplyDeleteCheesemaking is fun and fascinating!
For inexpensive temp control checkout homebrew forums, I built a digital programmable controller for about $40.
ReplyDeleteThanks for this. Really cool!
ReplyDeleteWonderful. Can't wait to try it!
ReplyDeleteThanks for the great post
You can buy a thermostat from amazon for around 60 bucks. They sell them for keezers and kegerators. I currently run a chest freezer as a refrigerator using one of these thermostats. They aren't user friendly, but you get the hang of them.
ReplyDeleteYou can bend the thermocouple so it is closer to the back of the fridge where the cooling coils are to trick it into thinking it is colder. Easy to do on a wine fridge. I do it to hibernate snakes.
ReplyDeleteThis comment has been removed by the author.
ReplyDeletewonderful read! On Amazon they sell a small $20 Compresson controller for beermaking. You guys sound handy enough to make it. I have one to keep my fermentation chamber at a steady temp http://brewprof.com/weekend-diy-homebrew-project-dual-stage-temperature-controller-stc-1000/
ReplyDeletemy question is , is there a difference in the making of mild cheddar to sharp cheddar???
ReplyDeleteThe only difference is how long the cheese is aged. We've found that about 10 weeks is sufficient for medium cheddar, twelve for sharp.
Delete- Patrice
http://www.cheesemaking.com/store/p/93-Refrigerator-Thermostat.html
Deletehttp://m.instructables.com/id/How-to-Make-a-Cave-to-Age-Cheese/
ReplyDeleteIt is just as important to maintain humidity as well as temp. 55 degrees at 85% humidity is where I live. Thank-you for sharing.
Great post - I find that putting the wax on is the trickiest part and that cutting the curds is the most rewarding!
ReplyDeleteThanks for sharing
adam.
I just stumbled upon your blog as I'm about to get a dairy cow and want to learn how to make cheese. Great info here, thanks! Also, I am right there with ya on all your stated philosophies, so I guess I'll be back. ;)
ReplyDeleteThank you so much. Humorous and informative.
ReplyDeleteGreat recipe and very helpful. Keep it up, don't give up. I will give it a try. Thanks.
ReplyDeleteAfter aging and removing the wax, is there any other processing that has to be done before putting it in the smoker?
ReplyDeleteApologies, I've never smoked cheese (I don't care for the taste) so I can't say for certain; however I would assume there's no further step that should be taken before putting the cheese in the smoker.
Delete- Patrice
Looking to try this myself. From what I can tell the only really hard part will be assembling the ingredients and keeping the area clean. I'm wondering if anyone out there knows if copper can be used to make molds. Specifically, if the copper will have any beneficial or detrimental effects on the cheese, like affecting the flavor, killing harmful or beneficial bacteria, or reacting with the whey. I know they've been used in cheeses like blue or Roquefort, but don't know the effect on cheddar. I'm hoping it's feasible since it seems like it would be a breeze to run up any number of molds with a hacksaw and the pipe size of your choice.
ReplyDeleteDo you let the cheese dry at room temperature to form the rind?
ReplyDeleteIs it possible to vacuum pack instead of using cheese wax?
Yes, it dries at room temp to form a rind. I have no experience with vacuum packing so I can't comment on whether it could replace wax. One thing to remember is wax doesn't put cheese into a state of suspended animation; it still ages within the wax and needs to be eaten in a timely fashion.
Delete- Patrice
How critical is humidity when you wax the cheese? My cold cellar can maintain a temp of 60*F all summer but can't get humidity over 57
ReplyDeleteWe can’t control humidity either. To produce precise, identical cheeses (i.e. a commercial product), I would imagine precise humidity control is necessary. The “fate” of home cheesemakers seems to be to produce edible cheeses that may vary slightly in taste or consistency. However I am by no means an expert cheesemaker. You might try Tim Young at Nature’s Harmony Farm (http://www.naturesharmonyfarm.com/).
Delete- Patrice
It is mentioned that the mesophilic culture is used for making cheddar cheese and thermophilic culture for mozzarella cheese,Byt in this recipe for making the cheddar cheese a few cubes of thermophilic culture is used. Is this a typo error ? very confusing
ReplyDeleteYou are quite correct, and thank you for pointing out the error! I've corrected the post.
Delete- Patrice